Ice fishing is more than a hobby—it’s a lifestyle. But braving sub-zero temperatures doesn’t mean you have to sacrifice comfort. With the right planning and gear, you can construct a cozy, functional ice fishing cabin that feels like a home on the ice. When I ran my overnight icefishing adventure business (Lakeland Expeditions) in Northeast Alberta, I learned (sometimes the hard way) what was essential in a shacks construction, and what makes the difference when it came to ensuring the comfort and safety of my customers.
With this article, it is my hope that I can pass some of my experience on to you, so you can take advantage of the 2025 summer to get started on the construction and outfitting of your own overnight icefishing haven.
In this guide, I’ll walk through some things to consider when building your ultimate ice shack, complete with a few Amazon product recommendations to outfit your space for warmth, efficiency, and durability, as well as my recommendations, based on 10 year of experience.
By starting your build this summer, you’ll be ready to fish in style by winter 2025-26!
Step 1: Plan Your Design
It all starts with a vision, and having a clear concept of what you want, and need in a shack. Before cutting loose and heading to your local hardware store wood yard you’ll need to sketch your ideal layout, whilst giving some considerations to the build:
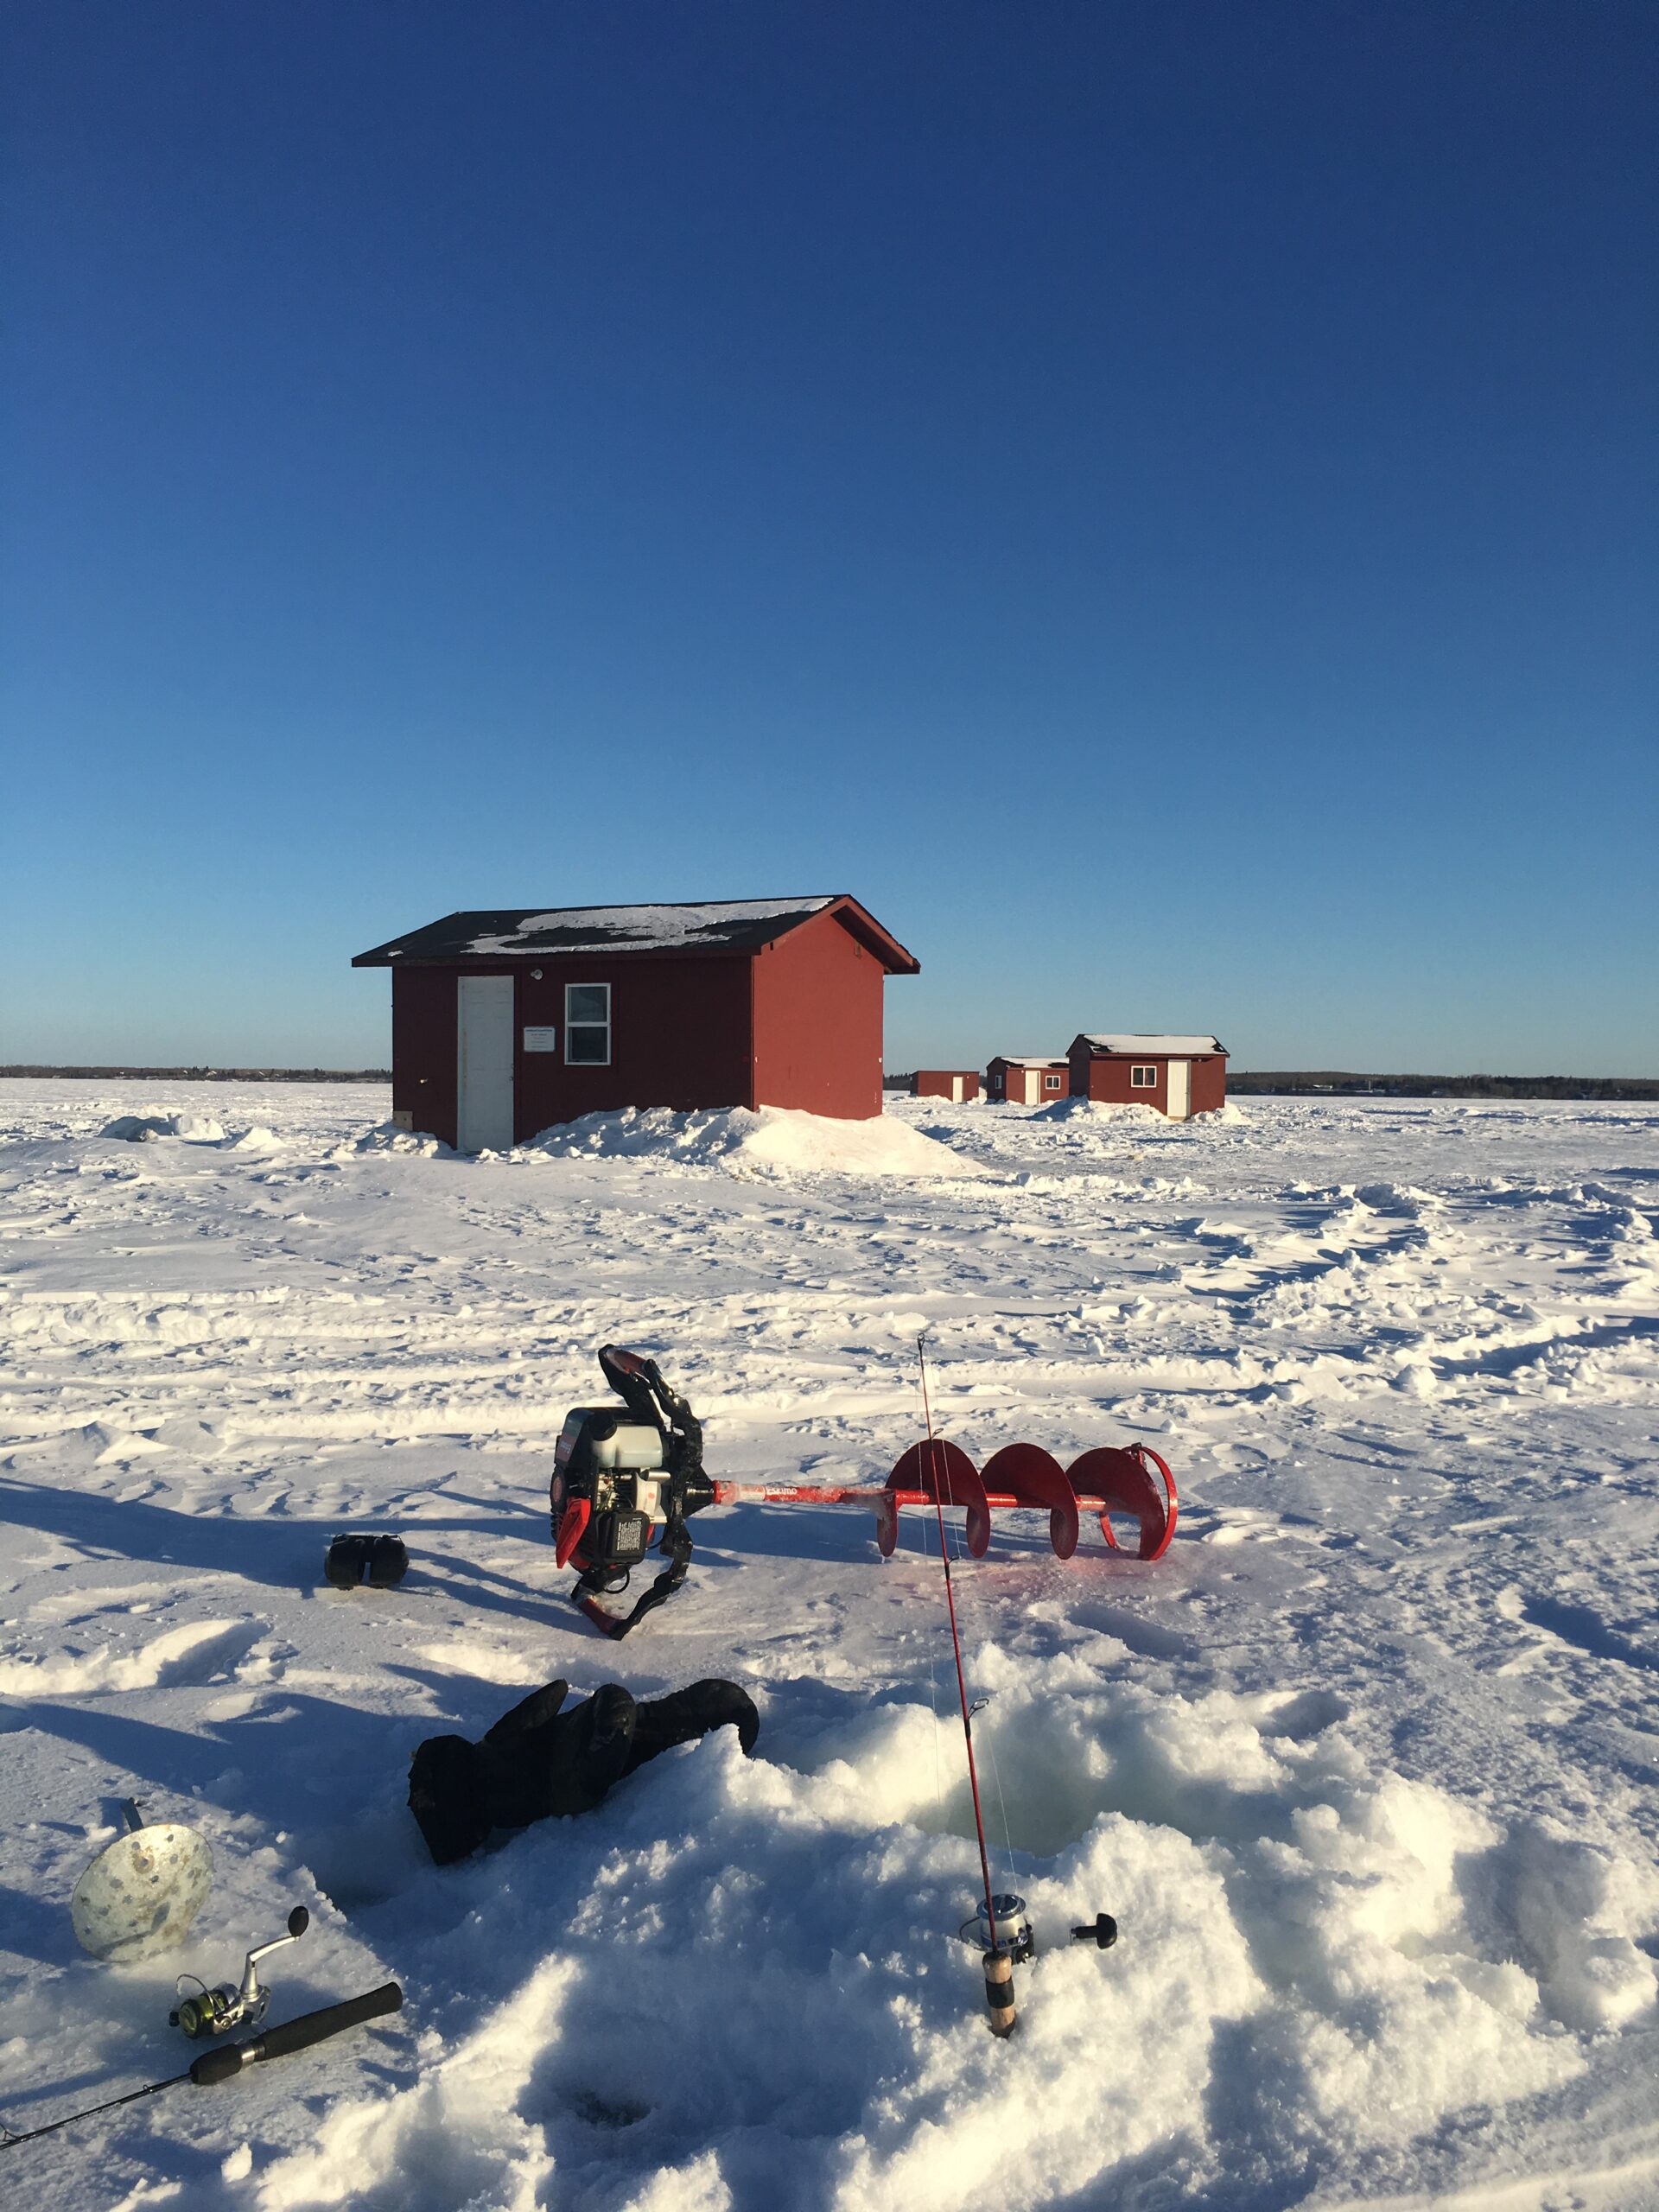
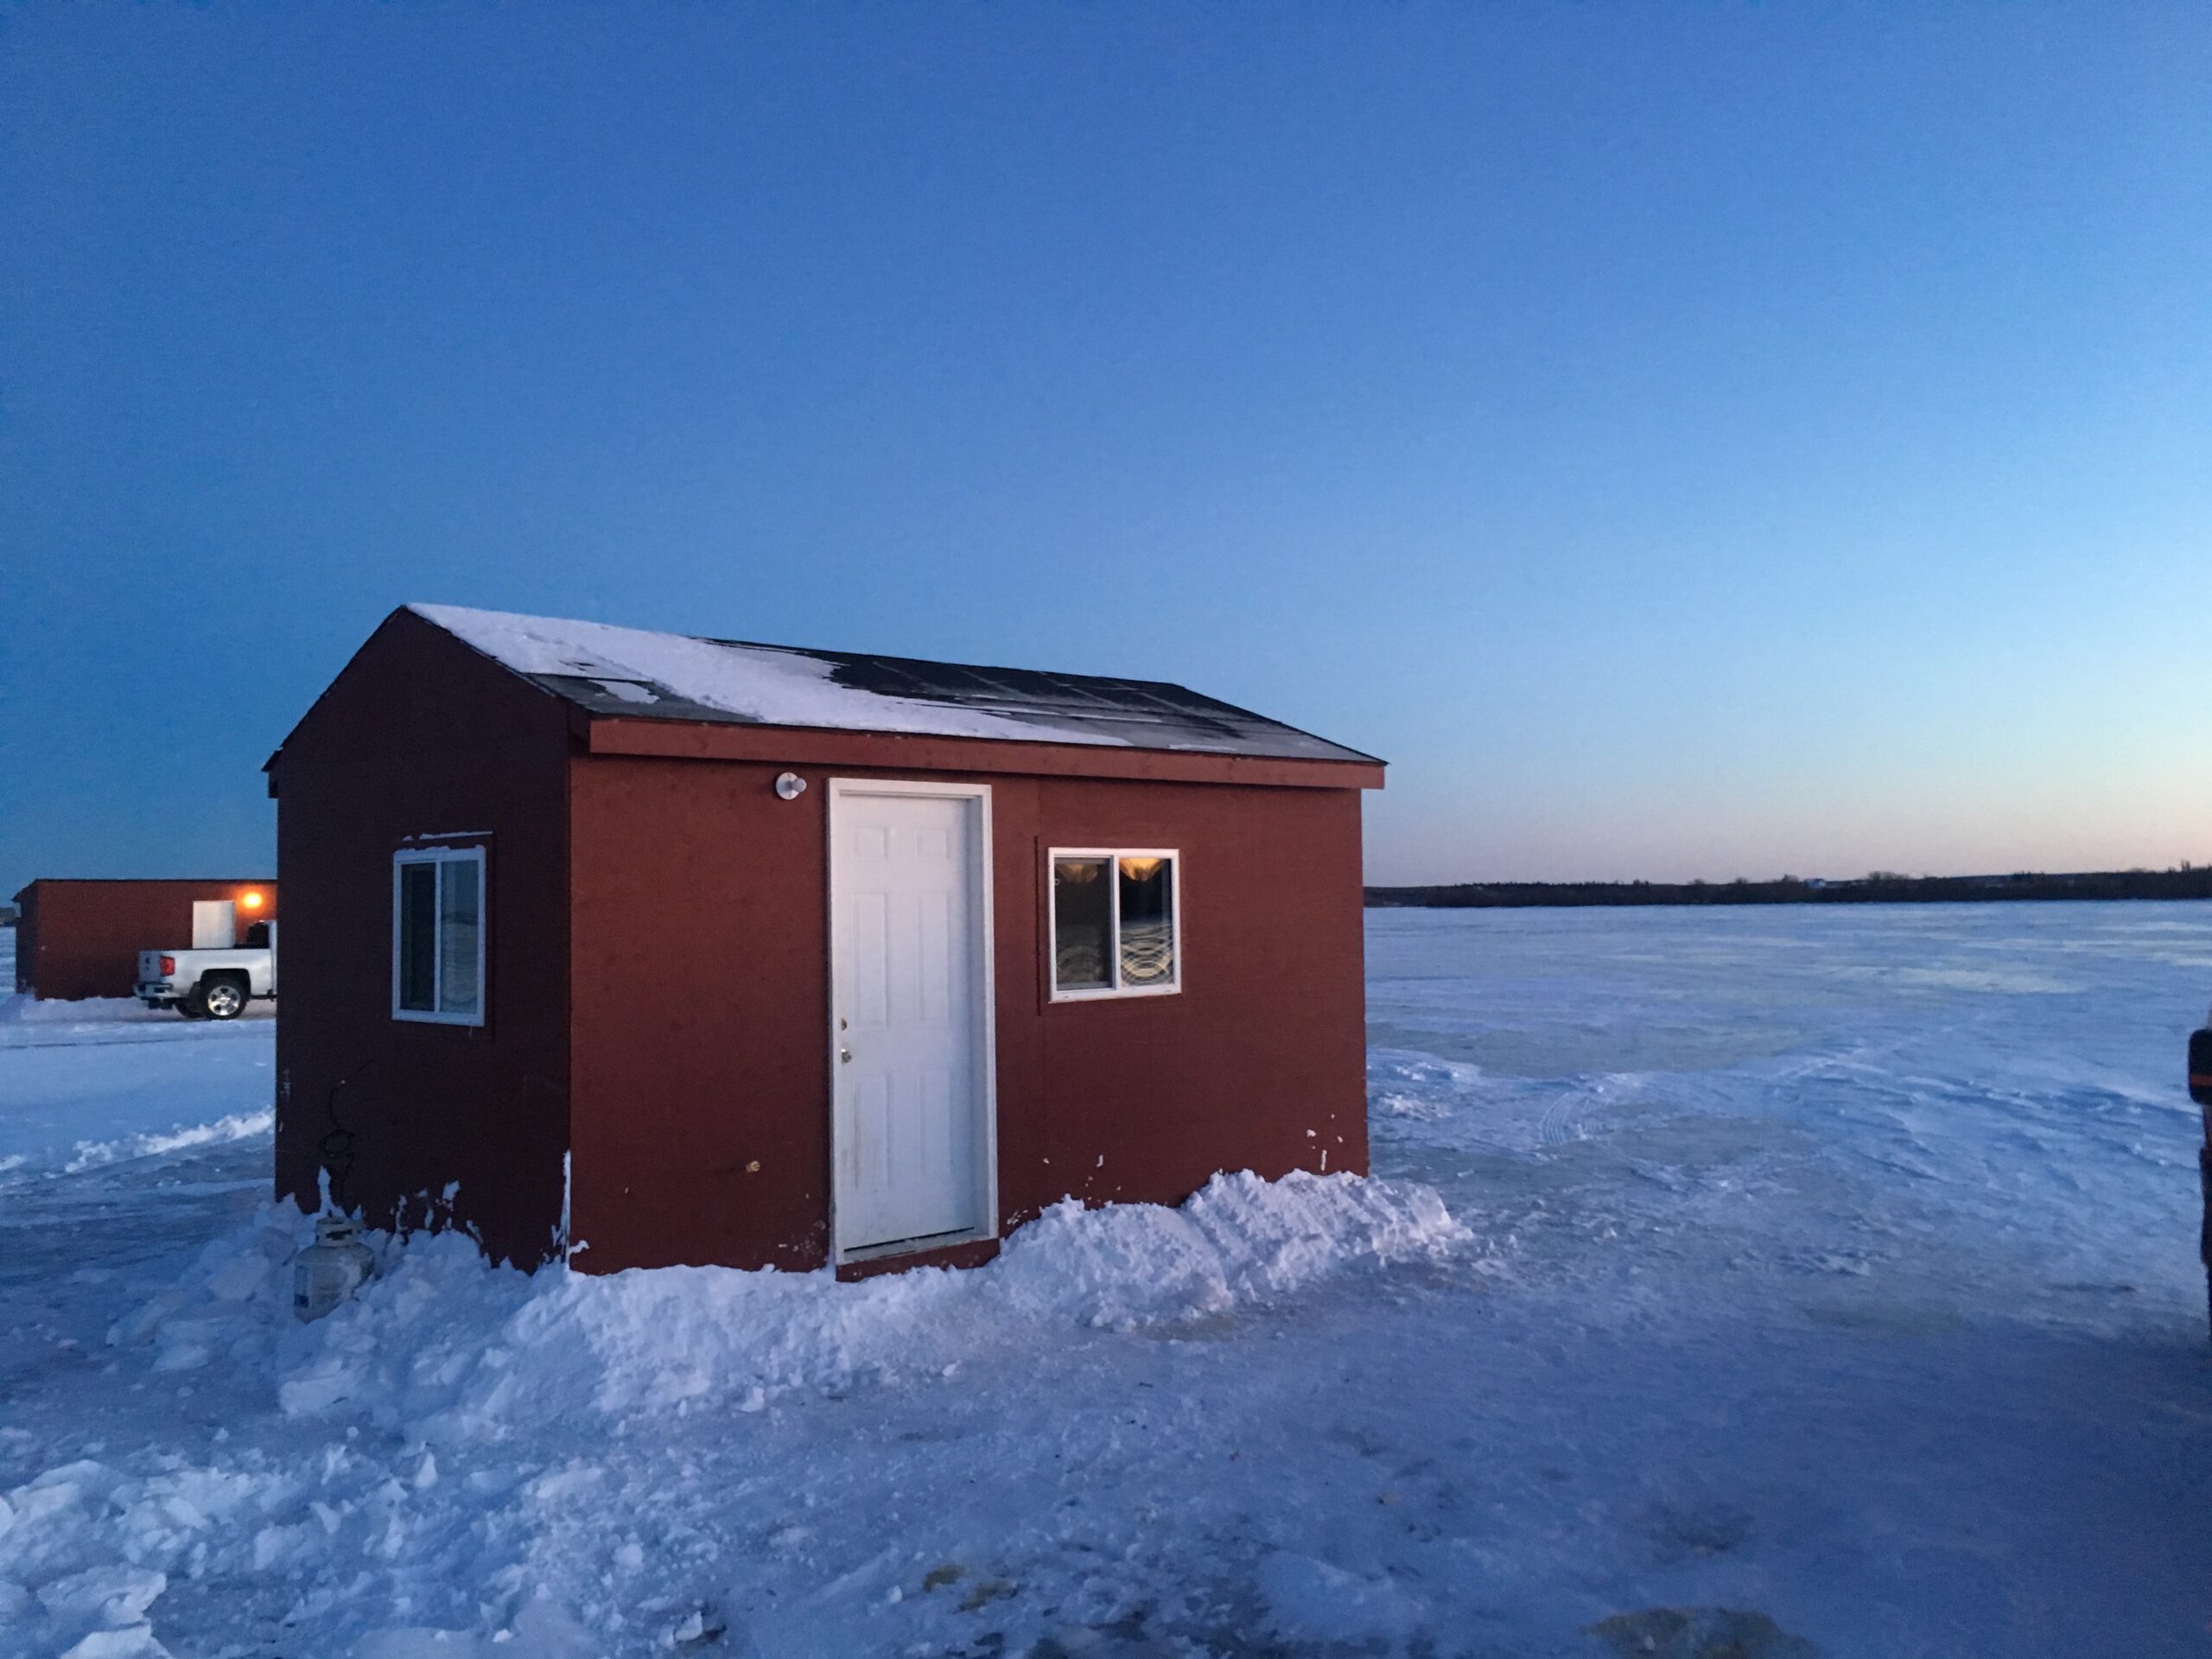
- Size: All depends on your ability to transport from home to the ice, or if you plan on moving around throughout the season. For something movable build on the smaller end and on skids. I would recommend a shack sized at either 8’x12′ or 8’x16’ (fits 2-4 anglers comfortably).
- Portability: Build on a trailer base or skids for easy transport. Or, build something light enough to be able to load and haul on a trailer.
- Insulation: Definitely a key detail. Prioritize walls, floor, and ceiling to retain heat and save on heating cost. Don’t sacrifice on overnight comfort, it makes all the difference!
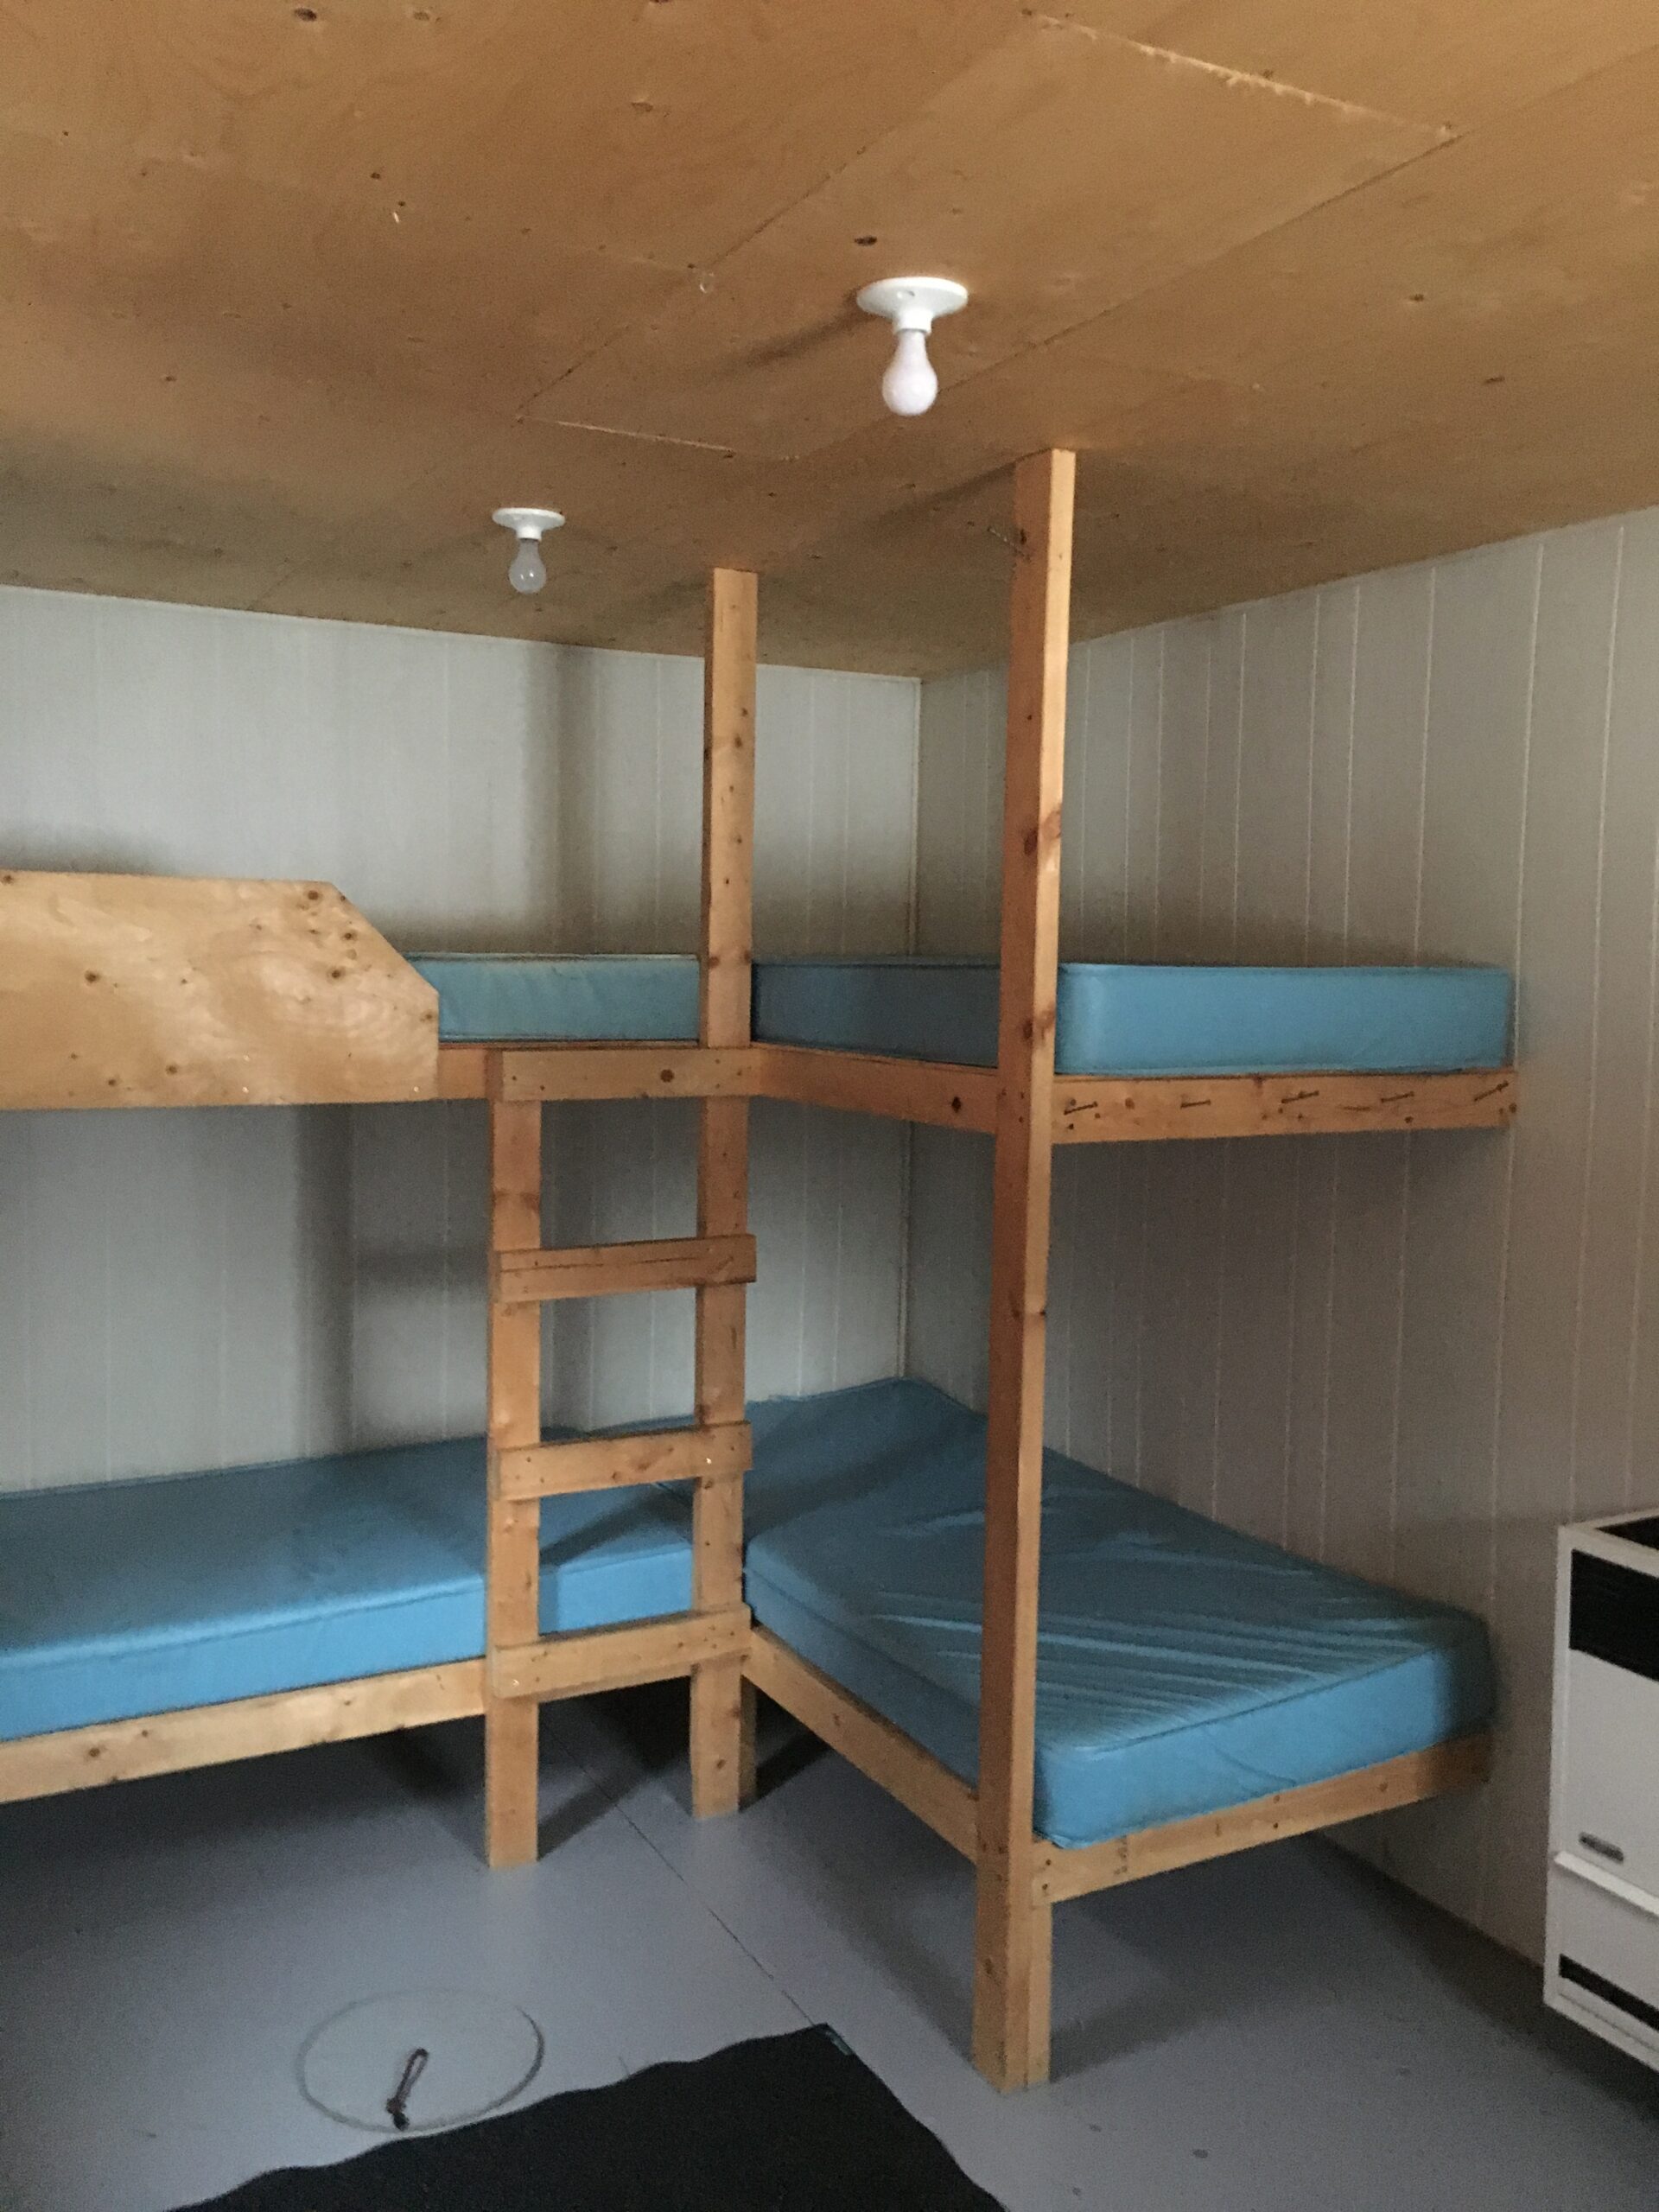
- Layout: Having a vision helps you decide whether you are going to include bunks vs cots, built in seating vs chairs, storage, and fishing hole locations, etc. Options are limitless and only bound by your imagination.
Here is what worked for Lakeland Expeditions: We had two sizes of cabins. The smaller 8x16ft (2 sleeper) and 10x16ft (4 sleepers). The cabins took advantage of sturdy built in bunks to maximize floor space, while being strong enough for heavier and adult size customers. Consider your layout, as having room to move about when you spend most of your waking hours staying warm inside on the colder days, keeps you from going shack wacky!
We used a tilt deck tandem axle trailer with a winch that made loading and unloading our shacks almost effortless. Think about your options before you get to far ahead of yourself, as building something you will have an issue moving with ruin your winter.
Pro Tip: You can use free online design tools like SketchUp to visualize your build, and get your layout and style figured out before cutting a board.
Step 2: Gather Materials & Tools
Provided that minimizing weight becomes a most important consideration, here’s my recommendation for you to consider before putting your building material shopping list together:
- Frame: 2×4 lumber for walls and roof. 2×6 would provide for more insulation R-value, but would make the shack really heavy. I suggest going with 2×6 frame for the floor for that extra sturdiness, and increased insulation option
- Floor: Go with either a 5/8″ or 3/4″ T&G Plywood on the inside, and sheet the underside with 3/8″. Tip: Frame your floor and sheet the underside first. Then flip the floor over to insulate and sheet the interior side.
- Walls: OSB or plywood sheets (3/8” thickness). I found sheeting both the interior and exterior with 3/8″ plywood provided the rigidity needed for moving the building year after year. This stood the test of time for our shacks. Going with 1/2″ is a step up, but likely overkill. Plywood vs. OSB gives a bit more of a cabin like feel, without the smell of OSB glue when things warm up inside.
- Insulation: Fibreglass batt (R-12+), rigid board or spray foam are the main options. If you decide to go with batt, consider using Roxul insulation in the floor rather than fibreglass, as moisture introduction from melting snow inside is likely. Foam board or spayfoam is a great option, but at a higher cost.
- Exterior: Corrugated metal siding or marine-grade plywood for weatherproofing. An annual staining of regular plywood does the trick as well and is easier to work with, and easier on the wallet.
- Roofing: Rubber membrane or metal roofing panels are the more pricey option, but roll roofing is a great alternative. Just make sure to use BlackGold roofing cement on edges prior to nailing to withstand high wind events on the ice.
Amazon Must-Haves:
- DEWALT 20V MAX Cordless Drill – For effortless assembly. As we recommend using deck screws to keep things tight.
- Tuck Tape – Seal gaps against drafts.
Step 3: Build the Foundation & Frame
- Base: Use a flat utility trailer or construct a skid frame with pressure-treated 4x4s. We found you could get way with sheeting the underside of the floor with 3/8″ plywood, and leaving out the skids. Even without the skids, our cabins easily pulled onto the trailer, and unloading was not an issue. With some of our first builds, we found having skids freeze into the ice was a pain. With a flat bottom, you can just lay down sleeper 4×4’s and lift the shack throughout the winter if necessary to place extra dimensional lumber underneath to prevent from having the shack freezing into overflow.
- Walls: Frame walls with 2×4 studs spaced 16” apart. Add extra bracing for wind resistance and stability. Include one or two vinyl slider windows for light and airflow.
- Roof: Opt for a sloped roof (6:12 pitch) to shed snow. We have tried peaked roofs, gambrel style roofs (great for a loft option), but the sloped roof is the quickest and easiest build. It really comes down to personal preference.
Kick Start Your Plans: Black and Decker Shed Plans has some great design ideas if you are unfamiliar with frame construction techniques, and if you need some design inspiration.
Step 4: Insulate Like a Pro
Cold air is the enemy, especially in winter. The more costly upfront option is to use rigid foam insulation for the walls and ceiling, and spray foam for gaps. You might see a bit higher insulation value, but I don’t believe it is worth the cost. You can achieve an acceptable R-Value with batt type insulation, and at a significant savings. Just remember to use a 6mil poly vapor barrier and acoustic sealant to keep drafts out. With our shack builds, we found batt type insulation was sufficient even when temperatures dropped down to -40c.
Step 5: Install Heating & Ventilation
A propane heater is non-negotiable. Pair it with a good carbon monoxide detector like the First Alert CO605A for safety. Don’t compromise! Carbon monoxide poisoning is not fun, and can cost you your life!
We outfitted our smaller 8×16 with an 11000 btu Williams Direct Vent wall heater and our larger 10×16’s with the larger 21000 Williams Direct Vent units. These propane furnaces were great. Over 10 years of use, and they were still functional when we sold off our shacks. They are thermosat controlled, and can run off of a 20 or 30lb propane tank. Although it seems the Williams units are not available on amazon.ca, the Ashley Hearth Direct Vent 17,000 BTU units would be similar in function and space saving design. The price point is affordable too.
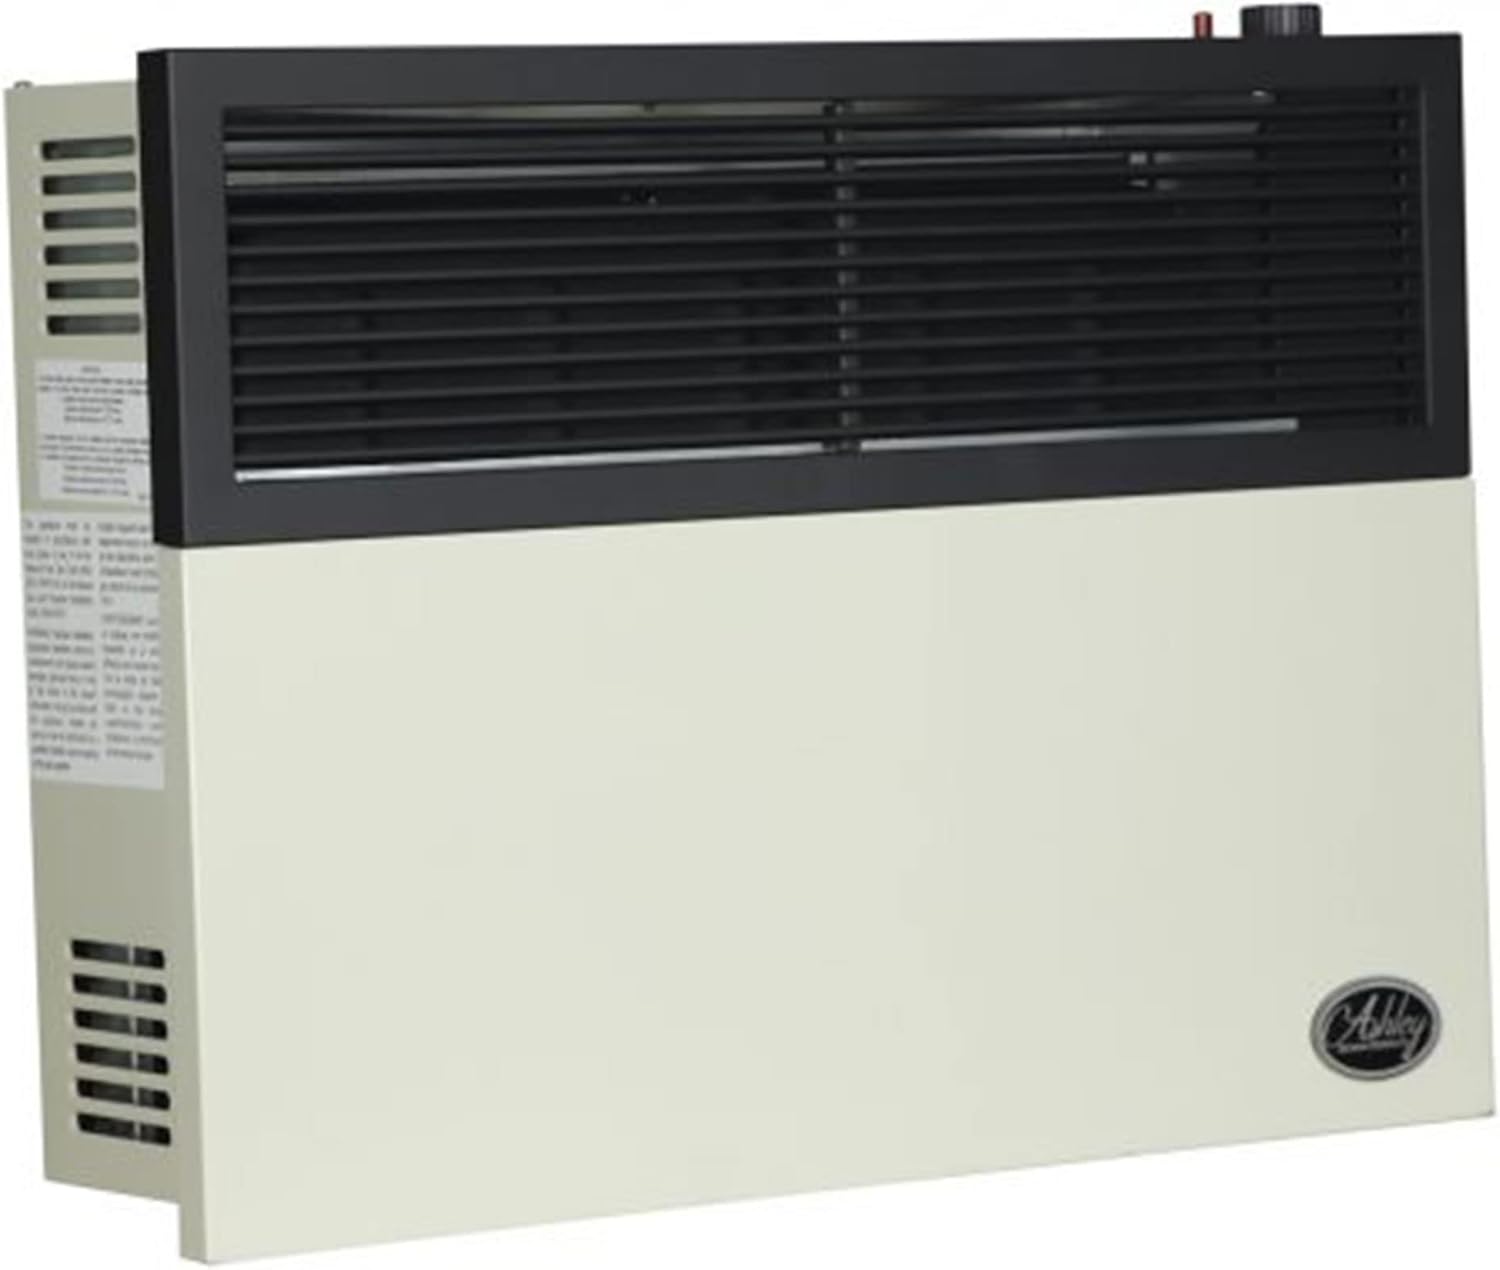
Woodstoves are also an option worth considering, if you don’t mind the mess and having to haul wood out on your trips. But they do take up way more floor space, which is an issue when you are working with limited floor area. They also require more attending to. With the propane units, you can set the thermostat, and fish.
I highly advise going with a direct vent unit, rather than ventless, just for piece of mind. With the direct vent units, you don’t get as much of the moisture issues, and you can sleep comfortably, knowing the combustion air is coming from outside, and exhaust is vented out.
Heating Essentials:
- The Comfort Glow 17,000 BTU Direct Vent propane furnaces is another great heating option.
- MARTIN 11,000 BTU Direct Vent Propane Furnace – Is a great option for smaller builds.
Step 6: Outfit the Interior
Transform your shack into a retreat:
- Flooring: Interlocking foam tiles for insulation and comfort and decor.
- Seating: Fold-down benches with storage underneath.
- Sleeping: Add a foldable foam mattress and build pull out beds for overnight trips. Or build bunks like we had.
Cozy Upgrades:
- Milliard Tri-Fold Mattress – Compact and comfortable.
- Or use a folding bed with mattress to allow for extra day time fishing space.
Step 7: Fishing-Ready Features
Once your shack build is complete, it’s up to you how you want to set things up most effectively for your needs. If you fish with rods, you might consider building some rod holders on one of the walls.
You can find a lot of ideas on-line by joining a Facebook Ice Fishing Shanty Page, or just searching for the latest and greatest gimmicks.
A few things I would suggest is good value for the money are:
- Holes: Cut 8-10” diameter holes and use Catch Covers to prevent freezing, and keep your valuables from falling down holes.
- Lighting: LED strip lights for visibility.
- Rod Holders: Mount adjustable racks near seats.
Fishing Gear Picks:
- Eskimo® Rattle Reel– Wall mounted design stays out of the way and keeps hands free.
Step 8: Final Touches
At this stage, your options are limitless, and you can tweak things to suit your specific needs. Add shelving, or storage cabinets, or a counter. Mount a TV to hook up your fish camera or watch the game for entertainment. Make things cozy enough, and you may find yourself not wanting to go home!
- Aesthetics: Add hooks for gear, a small table, and USB chargers.
Timeline: Build Smarter, Not Harder
Depending on your schedule, you will want to give your self a good chunk of time to allow your build to be wrapped up before next winter season. You might consider this as a rough schedule, but if you buckle down, you can get things put together in a much shorter timeline.
- June–July: Design and source building materials (lumber and plywood, windows, door, roofing).
- August–September: Construct and insulate the floor and frame the walls and roof. You will want to get things closed in with exterior sheeting, and roofing material installed before the elements become more of an issue in the fall.
- October–November: Install heating, electrical for lighting and power, then insulate the walls and roof (ceiling). Then finish thing off by installing furniture, and fishing accessories.
Why Build Now?
By starting early, you’ll avoid the winter rush and have some time to secure some deals on materials, and what better way to spend some sunny summer afternoons than listening to the sound of skill saws. Plus, testing your shack in fall weather lets you tweak layouts and to make sure your chosen heating options are ready to go before the deep freeze.
Ready to Get Started?
I hope with what I was able to offer in this quick article, you have picked up a few tips and ideas, and that you’ll create an ice fishing cabin that’s functional, warm, and built to last. Don’t forget to shop the linked Amazon products to streamline your build—they’re handpicked based on my experience and review for quality and value. Send me your DIY photos, and let’s make winter 2025-26 your best fishing season yet!
Disclosure: As an Amazon Associate, I earn from qualifying purchases. This post contains affiliate links.